
Deciphering the Language of Your Engine: A Comprehensive Guide to the MAP Sensor Wiring Diagram
Related Articles: Deciphering the Language of Your Engine: A Comprehensive Guide to the MAP Sensor Wiring Diagram
Introduction
With great pleasure, we will explore the intriguing topic related to Deciphering the Language of Your Engine: A Comprehensive Guide to the MAP Sensor Wiring Diagram. Let’s weave interesting information and offer fresh perspectives to the readers.
Table of Content
Deciphering the Language of Your Engine: A Comprehensive Guide to the MAP Sensor Wiring Diagram

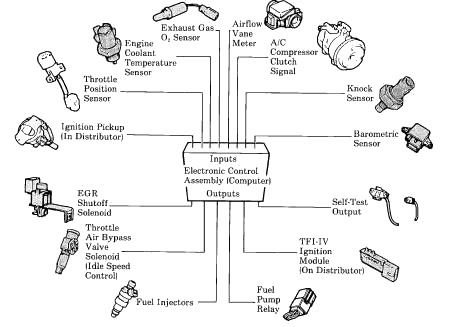
The intricate dance of combustion within your vehicle’s engine is a symphony orchestrated by numerous components, each playing a crucial role in ensuring optimal performance. Among these vital players is the Manifold Absolute Pressure (MAP) sensor, a small but indispensable component that provides the engine control unit (ECU) with critical information about the pressure within the intake manifold. Understanding the wiring diagram associated with this sensor is essential for diagnosing potential issues and ensuring the smooth operation of your vehicle.
Understanding the MAP Sensor’s Role
The MAP sensor, a pressure transducer, acts as a translator, converting the fluctuating pressure within the intake manifold into an electrical signal that the ECU can comprehend. This pressure, a direct reflection of the amount of air entering the engine, serves as a vital input for the ECU to calculate the appropriate fuel-to-air ratio for combustion.
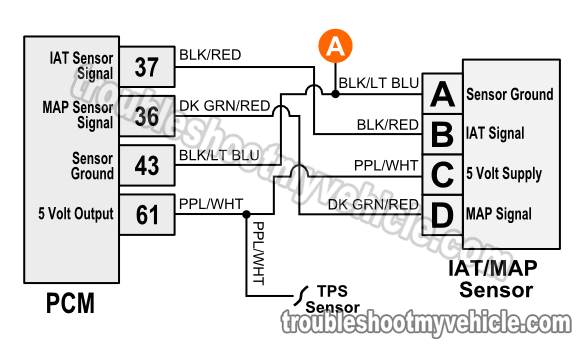
The Anatomy of a MAP Sensor Wiring Diagram
A typical MAP sensor wiring diagram, often found in your vehicle’s service manual or online resources, presents a visual representation of the sensor’s connections and their corresponding functions. This diagram serves as a blueprint, guiding technicians and enthusiasts in understanding the sensor’s electrical flow and troubleshooting any potential issues.
Key Components of a MAP Sensor Wiring Diagram
-
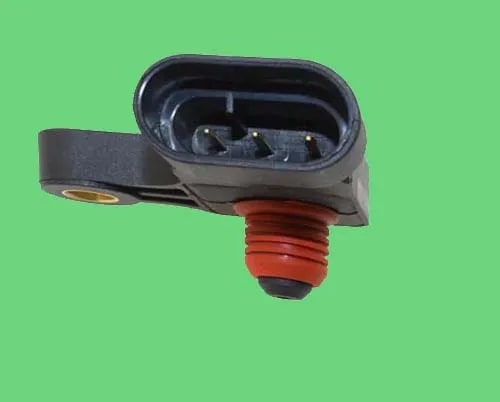
MAP Sensor: The heart of the diagram, the sensor itself, is typically depicted as a rectangular box with various pins or terminals protruding from its sides.
-
Power Supply: The sensor requires a constant power source, usually a 5-volt signal from the ECU. This is represented by a wire labeled "VREF" or "5V" on the diagram.
-
Signal Wire: This wire carries the electrical signal generated by the sensor, representing the measured pressure within the intake manifold. It is often labeled "SIG" or "OUTPUT" on the diagram.
-
Ground Wire: Providing a path for the electrical current to return to the ECU, the ground wire is typically labeled "GND" or "GROUND."
-
Vacuum Line: Connecting the sensor to the intake manifold, this line allows the sensor to physically sense the pressure within the manifold. It is depicted as a dashed line leading from the sensor to the intake manifold on the diagram.
Interpreting the MAP Sensor Wiring Diagram
The arrangement of wires on the diagram provides valuable insights into the sensor’s functionality. For instance, the power supply and ground wires establish the electrical connection between the sensor and the ECU, while the signal wire transmits the pressure readings. The vacuum line ensures that the sensor accurately measures the pressure within the intake manifold.
Troubleshooting with the MAP Sensor Wiring Diagram
The wiring diagram becomes a valuable tool when diagnosing potential issues with the MAP sensor. By tracing the wires and checking for continuity, technicians can identify any broken connections, short circuits, or other wiring problems that might be hindering the sensor’s operation.
Common Issues and Solutions
-
Open Circuit: A broken wire or a loose connection can disrupt the electrical flow, preventing the sensor from communicating with the ECU. Using a multimeter to test for continuity along each wire can pinpoint the location of the break.
-
Short Circuit: If a wire comes into contact with another wire or a grounded component, it can create a short circuit, interfering with the sensor’s signal. Isolating the affected wires and repairing the short circuit is essential for restoring proper operation.
-
Vacuum Leak: A leak in the vacuum line connecting the sensor to the intake manifold can result in inaccurate pressure readings. Inspecting the vacuum line for cracks, holes, or loose connections can identify and resolve the issue.
Beyond the Diagram: Additional Considerations
While the wiring diagram provides a visual blueprint, understanding the sensor’s operational principles is equally crucial for effective troubleshooting.
-
Sensor Calibration: The MAP sensor needs to be calibrated to ensure accurate pressure readings. This calibration process involves the ECU comparing the sensor’s output to a known pressure reference.
-
Environmental Factors: Temperature and altitude can affect the sensor’s readings. The ECU incorporates adjustments based on these factors to maintain accurate calculations.
-
Sensor Degradation: Over time, the sensor’s internal components can wear down, leading to inaccurate readings. Replacing a faulty sensor is essential for maintaining optimal engine performance.
FAQs
1. Can I use a generic MAP sensor for my vehicle?
While some generic sensors may fit physically, they might not have the same calibration or output range as the original sensor. Using an incompatible sensor can lead to inaccurate readings and engine problems.
2. How do I test the MAP sensor?
Using a multimeter, you can test the sensor’s output voltage by applying a known vacuum or pressure to the sensor’s port. The voltage should vary proportionally to the applied pressure.
3. What are the symptoms of a faulty MAP sensor?
A faulty MAP sensor can manifest in various symptoms, including rough idling, stalling, poor acceleration, increased fuel consumption, and engine misfires.
4. How often should I replace the MAP sensor?
The lifespan of a MAP sensor varies depending on the vehicle and driving conditions. However, most sensors can last for several years or tens of thousands of miles.
5. Can I clean the MAP sensor?
While some sensors may have a replaceable filter, it is generally not recommended to attempt cleaning the sensor itself. Cleaning can damage the delicate internal components.
Tips
-
Refer to your vehicle’s service manual: This manual provides detailed information about the MAP sensor and its wiring diagram specific to your vehicle model.
-
Use a reputable parts supplier: Ensure you are purchasing a high-quality MAP sensor from a trusted source.
-
Seek professional assistance: If you are unsure about troubleshooting or replacing the MAP sensor, consult a qualified mechanic.
Conclusion
The MAP sensor wiring diagram serves as a vital tool for understanding the sensor’s connections and troubleshooting potential issues. By carefully examining the diagram and understanding the sensor’s operating principles, you can gain valuable insights into the health of your vehicle’s engine and ensure optimal performance. Remember to consult your vehicle’s service manual for specific details and always seek professional assistance when necessary.


![[DIAGRAM] Gm Map Sensor Wiring Diagram - MYDIAGRAM.ONLINE](https://wiringall.com/image/wiring-diagram-2011-hyundai-sonata-map-sensor-connector-7.jpg)

Closure
Thus, we hope this article has provided valuable insights into Deciphering the Language of Your Engine: A Comprehensive Guide to the MAP Sensor Wiring Diagram. We thank you for taking the time to read this article. See you in our next article!