
Post-Replacement Procedures for a Manifold Absolute Pressure (MAP) Sensor
Related Articles: Post-Replacement Procedures for a Manifold Absolute Pressure (MAP) Sensor
Introduction
In this auspicious occasion, we are delighted to delve into the intriguing topic related to Post-Replacement Procedures for a Manifold Absolute Pressure (MAP) Sensor. Let’s weave interesting information and offer fresh perspectives to the readers.
Table of Content
Post-Replacement Procedures for a Manifold Absolute Pressure (MAP) Sensor

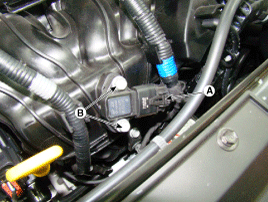
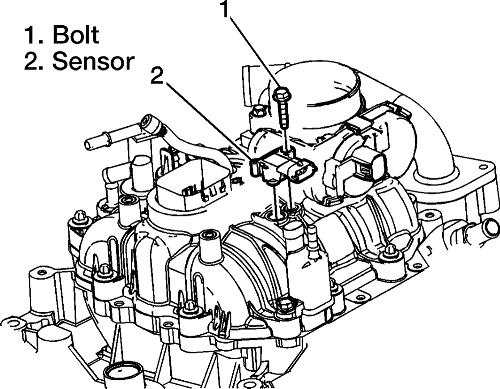
The manifold absolute pressure (MAP) sensor, a crucial component in modern internal combustion engines, plays a vital role in determining engine load and adjusting fuel delivery. When a MAP sensor malfunctions, it can lead to a range of engine performance issues, including rough idling, stalling, hesitation, and decreased fuel efficiency. Replacing a faulty MAP sensor is often a necessary step to restoring optimal engine performance. However, the process does not end with the replacement itself.
This article aims to provide a comprehensive guide to the procedures that should be undertaken after replacing a MAP sensor, highlighting the importance of these steps in ensuring proper functionality and maximizing the benefits of the replacement.
Post-Replacement Procedures:
-
Clear the Diagnostic Trouble Codes (DTCs): After installing the new MAP sensor, it is essential to clear any stored diagnostic trouble codes related to the sensor. These codes are stored in the engine control unit (ECU) as a result of the malfunctioning sensor. Clearing these codes allows the ECU to start fresh with the new sensor.
-
Verify Proper Connection: Double-check that the new MAP sensor is securely connected to the electrical harness and the vacuum line. Loose connections or leaks can result in inaccurate readings and further engine problems.
-
Perform a Visual Inspection: A visual inspection of the new sensor and its surrounding components is crucial. Look for any signs of damage, leaks, or debris that could interfere with the sensor’s operation.
-
Engine Start-Up and Idle Test: Once the sensor is installed and connections are verified, start the engine and observe its idle. The engine should idle smoothly without any noticeable roughness or hesitation. If the engine idles erratically, there may be other issues that need to be addressed.
-
Test Drive: After a brief idle test, take the vehicle for a test drive. Pay close attention to the engine’s performance, including acceleration, responsiveness, and fuel efficiency. The engine should operate smoothly and respond promptly to throttle inputs.
-
Monitor for DTCs: After the test drive, scan the ECU for any new diagnostic trouble codes. The presence of new codes could indicate a problem with the new sensor or a related component.
Importance of Post-Replacement Procedures:
The post-replacement procedures are crucial for several reasons:
-
Ensuring Proper Functionality: The steps outlined above help ensure that the newly installed MAP sensor is functioning correctly and providing accurate readings to the ECU.
-
Preventing Further Damage: Failure to clear DTCs or address any issues identified during the test drive can lead to further damage to the engine or other components.
-
Maximizing Fuel Efficiency: A properly functioning MAP sensor contributes to optimal fuel efficiency by allowing the ECU to accurately adjust fuel delivery based on engine load.
-
Improving Engine Performance: A new MAP sensor can significantly improve engine performance, resulting in smoother acceleration, quicker response, and a more enjoyable driving experience.
Frequently Asked Questions (FAQs)
Q: What if the engine still runs poorly after replacing the MAP sensor?
A: If the engine continues to exhibit problems after replacing the MAP sensor, it is essential to investigate other potential issues. These may include:
- Faulty Vacuum Line: A leak or blockage in the vacuum line connecting the MAP sensor to the intake manifold can affect sensor readings.
- Faulty ECU: A malfunctioning ECU can prevent the new sensor from operating correctly.
- Other Engine Sensors: Issues with other engine sensors, such as the oxygen sensor or throttle position sensor, can also contribute to poor engine performance.
Q: How often should I replace the MAP sensor?
A: MAP sensors are generally designed to last the lifetime of the vehicle. However, factors such as exposure to extreme temperatures, vibrations, and dirt can shorten their lifespan. If you suspect a problem with your MAP sensor, it’s best to have it inspected by a qualified mechanic.
Q: Can I replace the MAP sensor myself?
A: Replacing a MAP sensor is a relatively straightforward task that can be performed by a competent DIY mechanic. However, if you are unsure about the process, it’s best to consult a professional mechanic.
Tips for Successful MAP Sensor Replacement:
- Choose a High-Quality Sensor: Ensure you purchase a new MAP sensor from a reputable manufacturer to ensure quality and longevity.
- Use the Correct Tools: Employ appropriate tools for removing and installing the sensor to avoid damaging it or surrounding components.
- Inspect the Vacuum Line: Thoroughly inspect the vacuum line for leaks, cracks, or blockages before reinstalling it.
- Clear DTCs After Installation: Always clear any stored DTCs related to the MAP sensor after installation.
- Test Drive Thoroughly: Perform a thorough test drive to evaluate the engine’s performance and identify any remaining issues.
Conclusion:
Replacing a faulty MAP sensor is a crucial step in restoring optimal engine performance. However, the process does not end with the replacement itself. Implementing the post-replacement procedures outlined in this article is essential for ensuring that the new sensor is functioning correctly and maximizing its benefits. By following these steps, you can ensure that your vehicle is running smoothly, efficiently, and reliably. Remember that if you encounter any issues or are unsure about any aspect of the process, consulting a qualified mechanic is always recommended.


Closure
Thus, we hope this article has provided valuable insights into Post-Replacement Procedures for a Manifold Absolute Pressure (MAP) Sensor. We thank you for taking the time to read this article. See you in our next article!