
The Importance of AEM 5 Bar MAP Sensor Calibration: A Comprehensive Guide
Related Articles: The Importance of AEM 5 Bar MAP Sensor Calibration: A Comprehensive Guide
Introduction
In this auspicious occasion, we are delighted to delve into the intriguing topic related to The Importance of AEM 5 Bar MAP Sensor Calibration: A Comprehensive Guide. Let’s weave interesting information and offer fresh perspectives to the readers.
Table of Content
The Importance of AEM 5 Bar MAP Sensor Calibration: A Comprehensive Guide

In the world of performance automotive tuning, accurate manifold absolute pressure (MAP) readings are paramount. The MAP sensor, a crucial component in modern engine management systems, measures the pressure within the intake manifold, providing the engine control unit (ECU) with vital information for calculating fuel delivery and ignition timing.
The AEM 5 Bar MAP sensor, renowned for its enhanced pressure range and accuracy, allows for greater boost pressure readings, particularly beneficial for turbocharged and supercharged applications. However, even with this advanced technology, proper calibration is essential to ensure the sensor delivers precise data, leading to optimal engine performance and efficiency.
Understanding the Need for Calibration
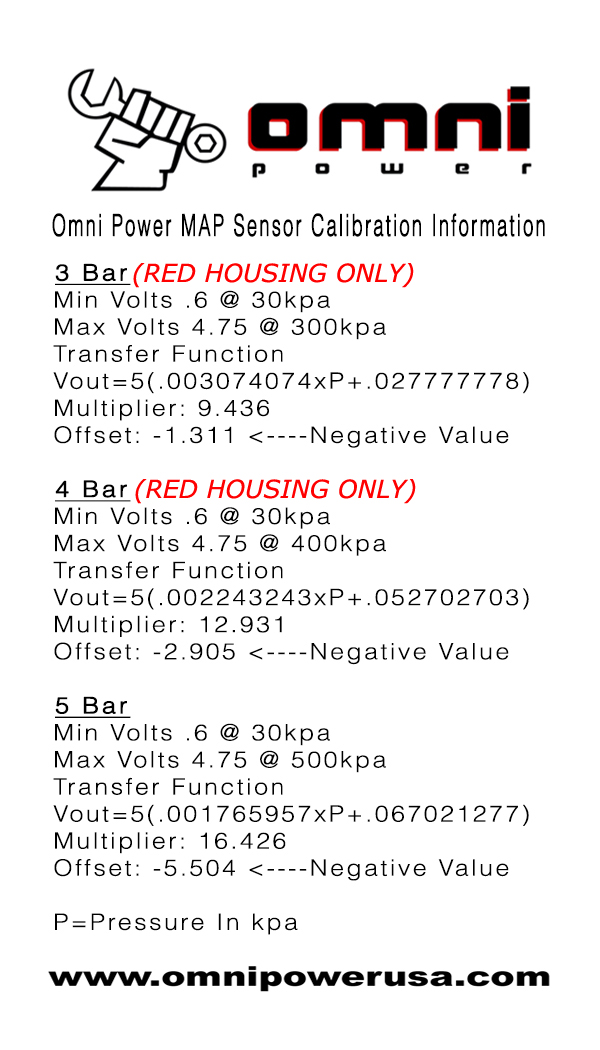
The AEM 5 Bar MAP sensor, unlike its standard 1 Bar counterpart, measures pressure in a much wider range. This extended range allows for accurate readings even at high boost pressures, exceeding the capabilities of a standard sensor. However, this increased range necessitates a specific calibration process.
Calibration ensures that the sensor’s output voltage accurately corresponds to the actual manifold pressure. This calibration process involves adjusting the sensor’s internal circuitry to match the ECU’s expectations, guaranteeing the correct interpretation of pressure readings by the ECU.
Benefits of Accurate Calibration
Precise MAP sensor calibration delivers a multitude of benefits:
- Optimized Fuel Delivery: Accurate pressure readings allow the ECU to calculate the ideal amount of fuel to inject, ensuring optimal air-fuel ratios for combustion. This translates to improved engine performance, reduced fuel consumption, and minimized emissions.
- Precise Ignition Timing: The ECU utilizes MAP sensor data to determine the ideal ignition timing, ensuring optimal combustion and power output. Proper calibration ensures the ECU receives accurate pressure readings, resulting in consistent and efficient ignition timing.
- Enhanced Boost Control: For turbocharged and supercharged applications, accurate MAP sensor readings are crucial for maintaining precise boost pressure. Calibration ensures the ECU receives accurate information, enabling effective boost control and maximizing power output.
- Reduced Engine Knock: Incorrect MAP sensor readings can lead to inaccurate fuel delivery and ignition timing, potentially causing engine knock. Proper calibration minimizes this risk, safeguarding the engine from damage.
- Smoother Engine Operation: Accurate pressure readings contribute to smoother engine operation, minimizing hesitation, stumbling, and other performance issues.
Calibration Techniques
The AEM 5 Bar MAP sensor calibration process typically involves the following steps:
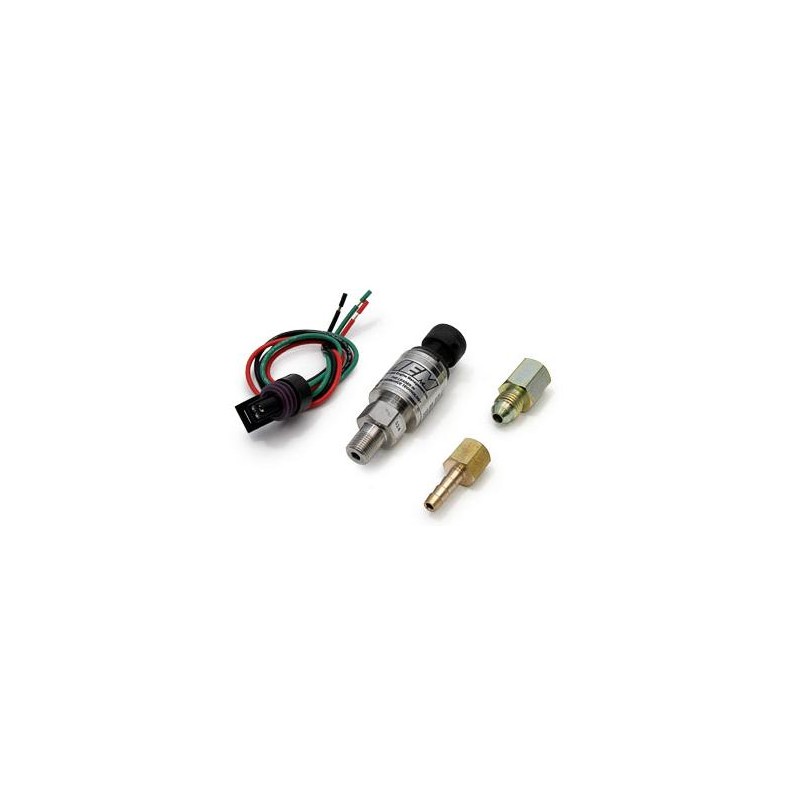
- Preparation: Gather the necessary tools, including a laptop, a calibration tool (such as AEM’s UEGO Wideband Controller), and a vacuum pump or pressure source.
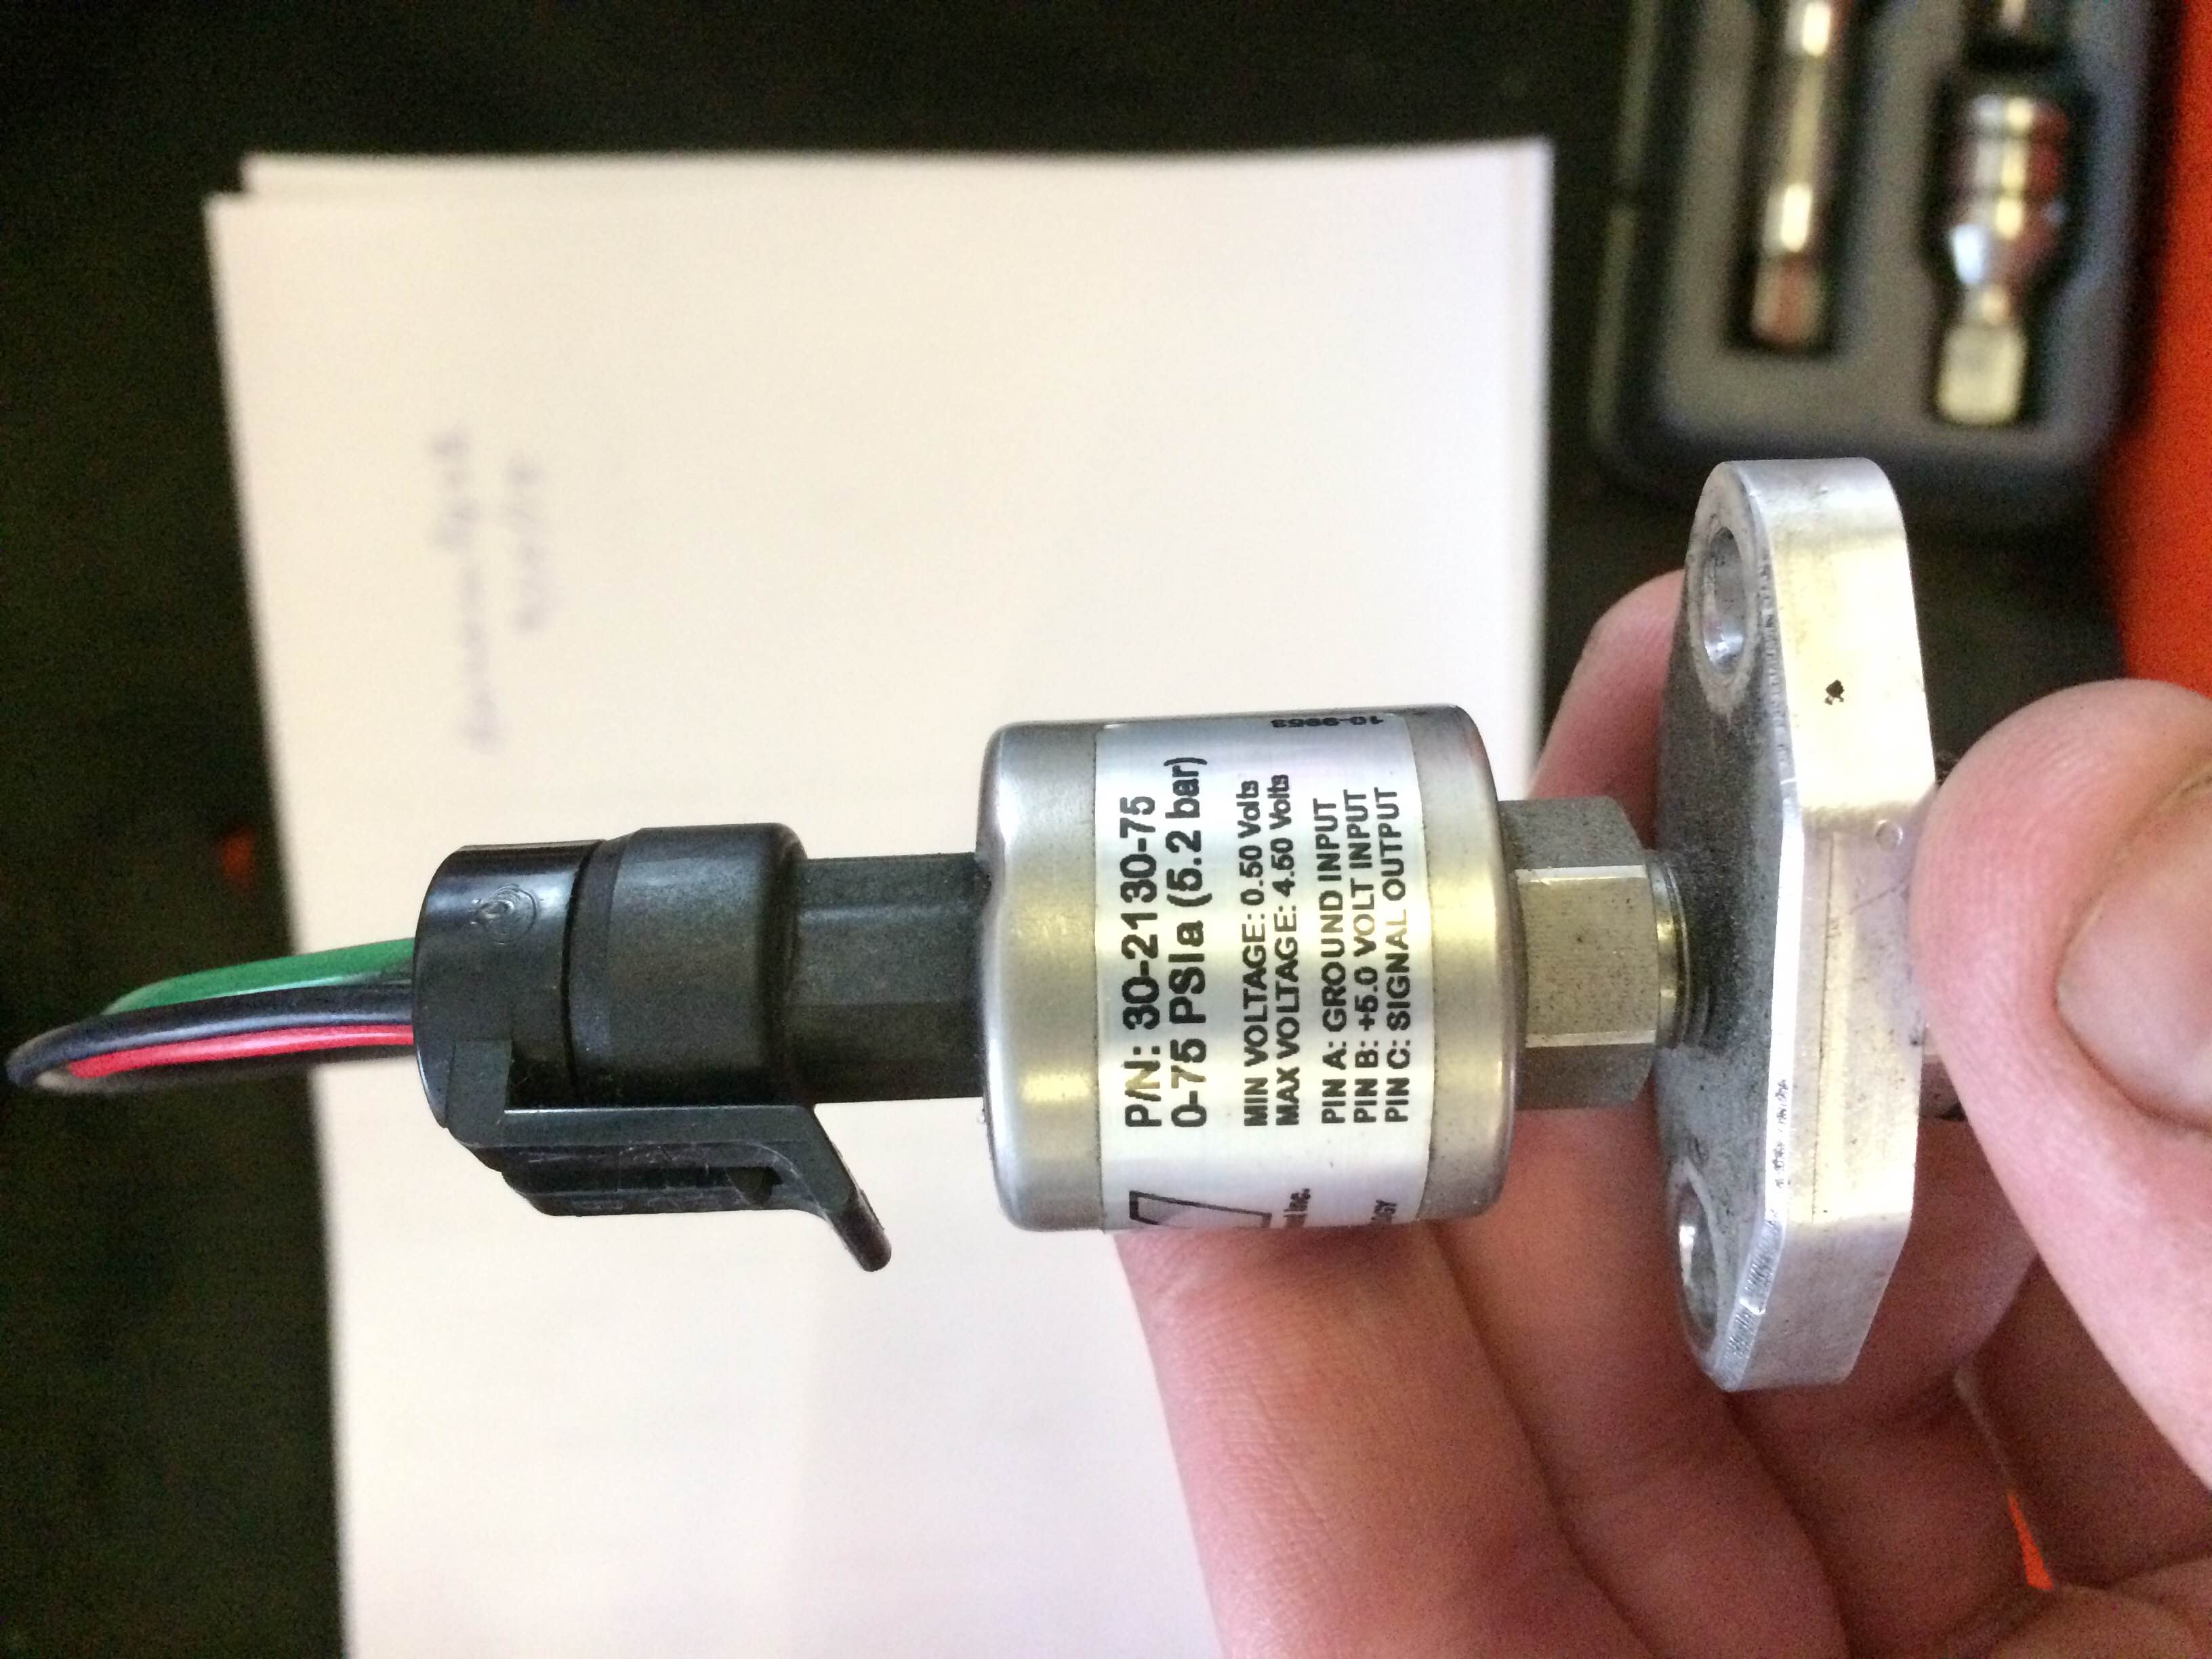
- Connecting the Sensor: Connect the AEM 5 Bar MAP sensor to the ECU and the calibration tool.
- Establishing Baseline: Apply a known vacuum or pressure to the sensor and record the corresponding output voltage. This establishes a baseline for calibration.
- Adjusting the Sensor: Using the calibration tool, adjust the sensor’s internal circuitry to match the expected voltage output for specific pressure values. This ensures the sensor provides accurate readings across the entire pressure range.
- Verification: Apply various pressures to the sensor and verify that the output voltage matches the calibrated values. This step confirms the accuracy of the calibration process.
- Saving the Calibration: Once satisfied with the calibration, save the settings to the ECU, ensuring the engine control unit utilizes the calibrated sensor data.
Calibration Tools and Resources
Several tools and resources are available to assist with AEM 5 Bar MAP sensor calibration:
- AEM UEGO Wideband Controller: This versatile tool offers a dedicated calibration feature specifically designed for AEM MAP sensors, simplifying the process.
- Laptop and Software: Using a laptop and specialized software, such as AEM’s DataLogger, allows for detailed calibration adjustments and data logging for verification.
- Vacuum Pump or Pressure Source: A vacuum pump or pressure source is essential for applying known pressure values during calibration.
- AEM Technical Support: AEM offers comprehensive technical documentation and support resources, including detailed calibration guides and troubleshooting tips.
FAQs about AEM 5 Bar MAP Sensor Calibration
Q: Is calibration necessary for all AEM 5 Bar MAP sensors?
A: While AEM 5 Bar MAP sensors are designed for accuracy, calibration is generally recommended to ensure optimal performance and compatibility with specific ECU settings.
Q: Can I calibrate the sensor myself?
A: Yes, with the right tools and knowledge, you can calibrate the sensor yourself. However, if you lack experience or are unsure, seeking professional assistance is recommended.
Q: How often should I calibrate the AEM 5 Bar MAP sensor?
A: Regular calibration is not typically required unless the sensor is damaged or modified. However, it’s a good practice to recalibrate if you make significant changes to the engine management system or experience performance issues.
Q: What are the signs of an improperly calibrated MAP sensor?
A: Signs of an improperly calibrated MAP sensor include:
- Poor engine performance, such as hesitation, stumbling, or lack of power.
- Increased fuel consumption.
- Engine knock or detonation.
- Erratic boost pressure readings.
- Engine warning lights or codes related to the MAP sensor.
Tips for AEM 5 Bar MAP Sensor Calibration
- Use a clean and reliable vacuum pump or pressure source.
- Ensure the sensor is properly connected and grounded.
- Follow the manufacturer’s calibration instructions carefully.
- Take your time and be meticulous during the calibration process.
- Verify the calibration results thoroughly before saving them to the ECU.
- If you encounter any issues, consult AEM’s technical support for assistance.
Conclusion
AEM 5 Bar MAP sensor calibration is a crucial step in optimizing engine performance and ensuring accurate pressure readings. By taking the time to calibrate the sensor correctly, you can unlock the full potential of your engine, achieving improved fuel efficiency, enhanced power output, and smoother operation. Remember, a well-calibrated MAP sensor is an investment in your engine’s health and performance, contributing to a more enjoyable and efficient driving experience.


Closure
Thus, we hope this article has provided valuable insights into The Importance of AEM 5 Bar MAP Sensor Calibration: A Comprehensive Guide. We hope you find this article informative and beneficial. See you in our next article!